For my pictures, I use a GIANT lightbox that I built with 5 sheets of foam board (my pieces are larger then the foam poster boards, and are from the mounting section of my local craft store, you can build what ever size works best for you) and white duck tape. All the sides are tapes and there is a hole at the top to take pictures looking straight down. I have two lights (these) with clamps from the hardware store. It's important that the light bulbs are natural light or daylight bulbs. Because of the size of my box, I probably need at least two more lights but at the moment I can make do with what I have.

This is my original picture from my light box. Ick! I obviously need more light but I can do a lot with this and make it work.
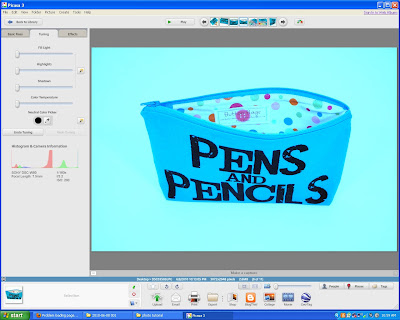
 To edit my photographs, I use Picasa which is a free program created by Google. It is really easy to use and is great for making your photos look awesome.
I start off by clicking the "I'm Feeling Lucky" button. Sometimes this helps, sometimes it makes things worse. If I don't like what it gives me, I just click undo and continue with the following steps. If it gives me something decent, I use this as my footwork, but follow the following steps to make things perfect.
 Increasing the highlights to increase the brightness. Generally I move this just about a quarter of the way before it mess the color up too much.
Adding fill light. Fill light, in my opinion, adds so dimension after the first round of editing. It makes the texture in the fabric more prominent and makes the background just that much whiter. Generally you can't add too much fill light without distorting the image. To correct background color, use the color temperature button. If your picture has a blueish hue, slide it slightly to the right. If your picture has a yellowish hue, slide it slightly to the left. Be careful not to adjust this too much or you may reverse your problem.
 Use the "retouch" button to get rid of lines or soften shadows.
 The retouch button allows you to select a spot to be "patched". You then must choose what you want it to be patched with, i.e. a pure white spot. Picassa will then blend the old and the new to create a soft change. If dramatic lines or "impurities" cannot be fixed by doing this, I save my progress, switch into paint and use the paint brush to paint white over this blemish and then go back into Picassa to blend the area.
 Cropping the picture because their is too much negative space
 Finished Product!
Too much highlight will make your pictures look like this;
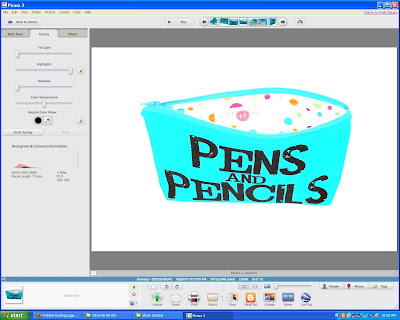 Too much fill light will make you pictures look like this;
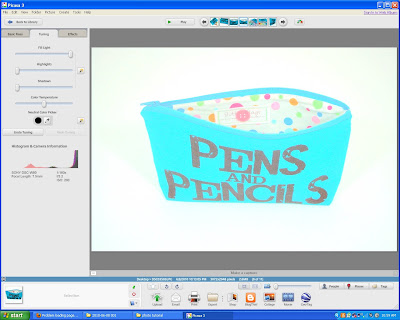 Too much shadow will make your pictures look like this;
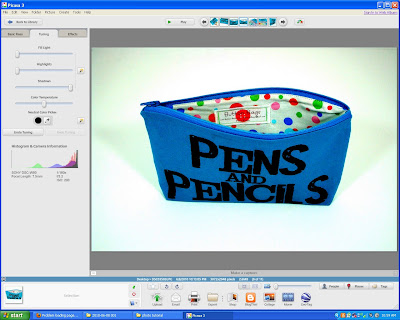 Too far to the right on color temperature will make your photos yellow like this;
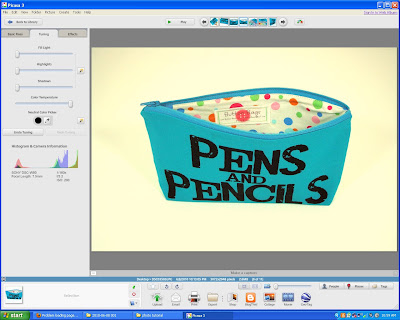 Too far to the left on the color temperature will make your photos really blue like this;
 Different stagings:
Staging is really important, especially for your first picture. The first picture should have what I like to call "thumbnail appeal". Remember that this is the picture that will be seen in your shop, in searches, and treasuries. It should clearly show the product but also have some interrest to increase the potential of it being clicked or put into a treasury. Ideas for great "thumbnail appeal" :
-angles: a great way to make your first picture interesting without taking away from it or hiding it among other items is to take it at an angle; take pictures looking down, looking up, sideways etc.
- household items: Basic household items can be great props for photos if used in the right way. These props should not hide the item, or out shine them. Great props include simple books ( similar or plain colors and covers), tea cups or china are great for jewelry, scrapbook paper can add a simple, and cheap, background but make sure it's not too crazy.
For more staging ideas you can look at my other photos in my shop. (please excuse the one horrid listing that I haven't had time to re-shoot yet)
If you have questions or if you need help you can leave a comment here, send me an e-mail at thesweetbutton@aol.com or convo me on etsy.
